3 Step Ladder Safety Program: Step 2

Ladder Set Up

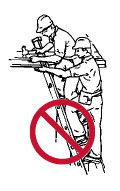
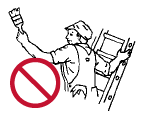
In most users' minds, handling and using ladders is straightforward and carefree. Unfortunately, some 4000 people are hospitalized annually in Canada as a result of ladder incidents. Incident statistics show that users regularly fail to recognize and eliminate or manage potential hazards. Incidents involving ladders often result in serious injury and may result in permanent disability or death.

Once a ladder appropriate for the task has been selected, MUST be thoroughly inspected (see section 3) before set up and use!


  • Do not use metal ladders where they may contact wires; metal ladders conduct electricity
  • Before using any ladder, first read, then follow, all the labeled warnings and instructions specific to that ladder; and pay close attention to what you are doing
  • Do not use a ladder if you are in poor health, tired, under the influence of drugs or alcohol, or physically incapacitated
  • Wear clean, sturdy shoes with slip-resistant soles
  • Always secure a ladder from movemen
  • Unless specifically labeled otherwise, ladders are designed to be used by one person at a time only
  • Do not exceed the labeled load-rating

  • Never use in high winds, or during an electrical storm
  • Never leave a ladder set up and unattended
  • Consult manufacturer for use in chemical or other corrosive environments
  • Remove oil, grease, mud, snow, ice or other foreign substance from hands, shoe-soles, steps and rungs, before climbing any ladder
  • Use a 2-way or trestle ladder, with one person per side, when a job requires two people
  • Most ladders are not intended to be used as, or on, scaffolds. Do not straddle or sit on rungs
  • Never store materials on ladders; securely support ladder in transit
  • Place ladder where access is not obstructed; do not place in front of unlocked doors
  • Avoid dropping, or applying an impact load to a ladder; if it has been dropped or subjected to impact, remove it from service until it can be inspected for damage
  • Except for small identification marks in translucent, acrylic lacquer, never paint any ladder; paint can hide cracks and other defects, and may alter the flashover-voltage properties of fibreglass or wood ladders
  • To protect wood ladders, periodically apply a clear, non-conductive preservative followed by spar varnish

What is “Kick-out”, and how to prevent it:

For Straight and extension ladders the correct set-up angle from horizontal is approx. 76 degrees (from whence comes the 1:4 rule); however, 5 degrees either way of 76 degrees is generally OK. At 76 degrees, the anti-slip feet of the ladder provide the maximum resistance to sudden outward “kick-out” of the ladder feet. Angles steeper than 80-degrees expose the user to falling over backwards; while, at angles shallower than 70 degrees, “kick-out” force intensifies perilously. Ladders “kick-out” when the slip-resistance provided by the ladder feet, is exceeded by an opposing force that intensifies as a user ascends a ladder.

“Kick-out” occurs for one or more of the following reasons…

  • Ladder is set up at too shallow an angle from horizontal
  • Ladder-foot friction pads are worn, missing, oily, or wet
  • Underfoot surface is slippery, icy, wet, oily, loose, etc.
  • User climbed beyond the ladder upper support point

Opposing slip-resistance is a frictional force dependent upon the combined weight of ladder and user; type and condition of the rubber foot-pads and type and condition of the surface underfoot. If the user climbs higher than available friction allows, the ladder feet suddenly and irreversibly, accelerate outward under the force of gravity.

In the following diagrams, red arrows indicate the direction and magnitude of the “kick-out” force that develops at different set-up angles, as a 200-lb climber approaches roof level. Assuming an average slip-resistance of 100 lb-f (see green arrows), note that the 100% margin of safety at 76 degrees, reduces to 33% at 72 degrees, and to 0% at 64 degrees. At that point a “kick-out” incident is highly probable under all but perfect footing conditions!

To avoid “kick-out”, watch your set-up angle, ensure a clean, slip-free footing, and if in doubt, use your “picks”, or block the feet from moving.

“Kick-Out” Load at Various Set-Up Angles

  • Set-up on level ground; use rubber safety feet on asphalt and concrete, and picks (spiked type feet) on grass or slippery surfaces. If you must set-up on ice or frozen ground, block the front of both feet to prevent outward movement
  • If you cannot level the ground, use a manufacturer approved leveler, on one or both legs
  • Tie-off the top, or side-rails to prevent sideways slip of the ladder
  • Do not overreach, get down and move ladder as needed; use help in setting up ladder, if possible
  • Never work higher than 3 feet from the top of the ladder
  • Avoid pushing or pulling off to the side of ladder, do not “walk” or “shift” ladder while on it, and maintain 3-point contact at all times
  • If using a ladder to go onto a roof, the top of the ladder should extend at least 3 feet and no more than 4 feet above the roof line
  • Keep body centered between side rails
  • Ensure that top and bottom of ladder are properly supported
  • Extend fly section and engage rung locks. Make sure rope does not create a tripping hazard or interfere with activity near the ladder
  • Tying the bottom fly rung to adjacent base rung is recommended
  • Extend and retract fly section only from the ground and when no one is on the ladder
  • Hang ladder on racks at intervals of 6' for support, and never hang a ladder from a rung
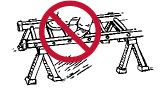
  • Do not overextend the fly-section. A minimum overlap of sections is required as follows:

    Ladder Size Overlap Required
    Up to and including 32' 3'
    Over 32', up to and including 36' 4'
    Over 36', up to and including 48' 5'
    Over 48' 6'

How to carry an extension ladder

  • Get help to carry any ladder that you do not feel comfortable lifting
  • While there are many ways to safely carry an extension/straight ladder, one method for ladders under 16-feet in section length and 40-pound weight, is as follows…
    1. Lay fully retracted ladder on its side on the ground, with fly-side facing away from you, and ladder-feet behind you to your right
    2. Count the number of rungs on the base, note where the centre of the ladder is then walk along the ladder to the first base-rung past the centre
    3. With your body at right angles to the ladder, and without twisting or bending your back, bend your knees and grasp one of the upper rails in each hand, right hand behind the left
    4. Straighten legs and stand, allowing arms to fully extend
    5. Walk forward carefully; if you need to turn, do so with your feet not your waist

How to raise/lower an extension ladder

  • Get help raising any ladder that you do not feel comfortable raising/lowering alone
    1. Position the ladder fly side up, at right angles to the wall and with the top end of the ladder approx. 3 feet from the wall
    2. While standing in front of, and facing, the top of the ladder, bend knees slightly, grasp and lift both base rails and straighten up, while retaining a loose grip on each rail
    3. Walk toward the centre (approx. balance-point) of the ladder, while sliding your hands along the rails
    4. Firmly grasp both rails and extend your arms to a full upright position
    5. Walk backwards towards the wall, and rest the top of the ladder against it
    6. Walk to a position immediately behind the ladder feet, and while bracing the ladder feet to keep them from moving, extend the fly to the appropriate height
    7. Grasp the ladder rails at waist height, lift the foot end clear of the ground then move toward the wall until the long-leg on the set-up-assist label is vertical, or the foot of the ladder is 1 foot out from the wall for every 4 feet of height to the ladder support point
    8. If you are on a hard, clean, non-slip surface ensure that each rubber foot pad is resting squarely and evenly on the surface
    9. If you are on a soft, loose, or slippery surface, rotate each ladder foot until the “picks” are behind the base rail and pointing down. Using your foot, on the bottom ladder rung, push each pick into the ground as far as possible

  • For heights over 20 feet or as otherwise stipulated by Provincial Ministries of Labour, use scaffolding instead of a step ladder
  • Open step ladders completely and ensure spreaders are locked and ladder is stable before climbing
  • Set all four feet on firm, level surface; do not place on unstable, loose, or slippery surfaces
  • Climb only front side of ladder, face ladder when climbing up and down; maintain a firm grip and 3-point contact when ascending and descending the ladder
  • Keep body centered between side rails; do not overreach, get down and move ladder as needed
  • Do not climb, stand, or sit on spreaders, rear braces, ladder top, or pail shelf
  • Do not straddle front and back; do not climb from one ladder onto another
  • Avoid pushing or pulling off to the side of ladder; do not “walk” or “shift” ladder while on it
  • Never climb a step ladder while it is closed and leaning against anything for “support”

How to carry a Step Ladder

  • Get help to carry any ladder that you do not feel comfortable lifting
  • One method of carrying a closed, light-weight stepladder is:
    1. Place it on its side, on the ground, with the head-tray in front of you to the left
    2. Stand facing forward, opposite the "balance point" approximately one third of the ladder's length forward of the ladder-feet
    3. Bend the knees, without twisting or bending your back, and grasp the upper rail with your right hand (use both hands for heavier ladders)
    4. Straighten your legs and carry the ladder by your side with right arm fully extended